
I've been putting off rear brake shoe replacement on the 4Runner for quite a while. In fact, it's been almost six months to the day since I replaced the rear axle seals, and I've needed to do the job since then - the gear oil that leaked out through the brake drums, having contaminated the rear brake shoes. But, I didn't want to replace the shoes at the same time I replaced the axle seals because it was my first time doing the seal job and I wanted to make sure the new seals were working correctly before I risked ruining a second set of brake shoes. Then, the 4Runner was in an accident, and I wasn't sure if we were going to get to keep it.
All that is now in the rear view mirror, so the only thing keeping me from getting the brakes in (better) working order was my own procrastination. Relying only on information from other sources, I'd somehow worked this up in my head to be a very difficult job - lots of parts to keep track of, difficult springs to remove and install. Trouble waiting around every turn.
But, when we finally got a day of nice weather, I figured there was no better time than the present to just dive in and get it taken care of. And, as it turns out, it was easy!

If you're here just looking for a step-by-step guide on the process, I've written that up along with the parts and tools you'll need to do the job: Step by Step Tacoma Rear Drum Brake Shoe Replacement (also 4Runner). Or, for a bit more *story* keep reading below.
The first thing of course was to grab the parts that'd I'd purchased six months ago. This was easy since all the parts - to do both sides - come in one convenient box: Toyota Drum Brake Shoe Kit (04495-35230).

Tools also turned out to be quite simple - as projects go. In addition to jacking up the truck and removing the rear wheel, the only tools I needed for the brake job were:
- Two slot/flat screwdrivers
- A pair of needle nose pliers
- One medium-size (approx. 10-inch) vise grip pliers
- Brake cleaner (probably optional)
- A small amount of high quality grease (probably optional)
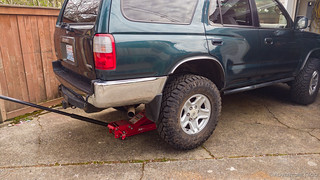
I got started by lifting the rear end of the 4Runner off the ground and removing the wheel. I decided to do only one side at a time so I could reference the other side if something went terribly wrong, and because I wasn't sure if it was going to start raining and I'd need to pack everything up as quickly as possible.
Removing the brake drums - the big metal bits that cover all the guts - was easy, and I knew it would be. I'd left the brake shoes - the guts inside the drum - relatively loose when I'd done the rear axle seals, and so in no time I was to the part of the process that worried me the most - removing the upper spring that pulls the shoes together.
From everything I'd heard, this was a major pain in the keester - sometimes a pain enough to require a special pair of pliers that are designed specifically for this operation. Armed with just a pair of vise grips, I grabbed onto the spring and voila, it released.
Really easily as far as I was concerned.

The rest of the disassembly went just as smoothly as the first step (for lots of photos and detail, check out Step by Step Tacoma Rear Drum Brake Shoe Replacement) and it took mere minutes to have all the parts laid out and cleaned up. And that was with me taking photos and trading phones since my Google Pixel battery seems to be the weakest battery ever to exist, turning itself off when the ambient temperature dips below 47°F. 

Removal of all the parts having been easy, I wasn't all that concerned about reassembly. There aren't really that many parts, and everything seemed reasonably self-explanatory given that I'd paid even a little bit of attention as things were removed. Probably the most complex bit was knowing which holes held the ends of various springs, and there was a pattern to that as well.


Soon enough, all the parts were greased up and reassembled; I was ready for the fitting of the drum and final adjusting of the shoes. This was the second element that I'd heard was hard to get right, but again I seemed to get lucky or something because I pulled it off without a hitch. All I had to do was:
- Initially, push the brake shoes towards each other as far as possible, compressing the cylinder.
- Fit the drum over the shoes to check fit.
- Remove the drum, use the brake shoe adjuster to push the shoes apart slightly and then check the drum fit again.
- Repeat step 3 until the drum fit snugly - but not tight/forced in any way - on the shoes as it is installed.
- Use the emergency brake in the cab to do the final adjustment of the shoes.
The first side of the 4Runner took me something like 45 minutes or an hour, the second side half that at most. In fact, having done this only twice now, I'd say that this was one of the easier jobs - at least assuming the rear brakes aren't rusted away - that I've done from the perspective of having to be meticulous and pay close attention.
And boy, is the braking ever better! My old shoes were quite obviously full of gear oil and not doing the job they should have been.