If you own a Toyota Tacoma - and especially if you drive it off-road or with any kind of lift - you're likely to have a CV axle boot crack or split at some point, flinging grease everywhere and making a royal mess.
I was lucky enough to have it happen on the first day of a two week trip to Anza-Borrego. Winning!

Once this happens, you essentially have three options:
- Do nothing. This is the route a lot of people take, sometimes because they don't even notice the problem. For me of course, it wasn't an option.
- Buy an entirely new CV axle and replace the one with the torn boot. This can be a reasonable option if you're willing to install an aftermarket axle - they can be had with lifetime warranties from places like Napa. I wasn't though - I want to go OEM (43430-04020) with a part like this, and that meant a new axle would run me on the order of $400-$500. Ouch.
- Buy the parts to reboot your existing CV axle. At something around $50, this reboot kit (95-04 Tacoma | 96-02 4Runner) is a more economical option - assuming you have the tools available to do the job.
It's probably obvious from my descriptions that I decided to go with option 3. Having never rebooted a CV before, I figured this could be a good learning experience - and if worse came to worse, I could always fall back to another option in order to get the truck buttoned up for the next trip.
The first step - as usual - was to assemble all the necessary parts and tools to do the job. I nearly succeeded at this, but as seems to be the case more often than not, there was one issue I'd run into as I progressed through the project.
Parts
The parts were simple - Toyota makes a reboot kit (96-04 Tacoma: 04438-04021 | 96-02 4Runner: 04438-35060) for these CV axles, and that kit has nearly everything you need: an inner boot, and outer boot, several boot clamps, some new snap rings, and the appropriate grease.

The one thing about this kit that I discovered is that the large inner boot clamp is different than the other three clamps included in the kit. It's the earless variety, which meant that it required a different tool, and was much harder to install then the other three clamps. Ultimately, I found it much easier - and more secure - to order a Moog 3401 CV Boot Crimp Clamp Kit (or this kit if the Moog are out of stock), which installed in the same fashion as the others and allowed me to get the job completed simply and easily (and have plenty of clamps to spare for the future)!
Update/Note: after doing the job, I've been told that the OTC 4724 Stinger Ear-Type CV Boot Clamp Plier works really well for this earless variety clamp, so if you don't want to purchase the additional clamps, you could just purchase the OTC tool and use the included clamps.

Contents of the Moog 3401 CV Boot Crimp Clamp Kit (or this kit if the Moog are out of stock).
Tools
Besides parts, there were a couple new tools I had to buy for this project. In all honesty, they are probably tools I should have had in my kit already, but this was a good excuse to add them:
- Stanley Proto J250G Proto 9-Inch Lock Ring Pliers - this is something I've wanted in the past, but I've never found a pair I'm really happy with. This pair seem very sturdy, and worked great.
- Knipex Tools 10 99 Ear Clamp Pliers - necessary to tighten the clamps used to secure three of the four rubber boot clamps, and the Moog clamps if you buy them.
- OTC 4724 Stinger Ear-Type CV Boot Clamp Plier - necessary to tighten the fourth OEM boot clamp, if you want to use it instead of the Moog clamps. Note: I didn't use this tool since I went with the Moog clamps, but I hear it works well.
And then, there were tools that I already had around:
- 35mm socket - for the axle nut.
- Wire cutters - for cutting the old boots and clamps.
- Impact wrench (or large breaker bar) - for the axle nut.
- 14mm socket - to separate the lower ball joint (LBJ) from the spindle.
- Torque wrench - to re-torque the LBJ bolts, as well as axle nut.
- Some brake cleaner, to clean up the CV joints and prepare them for new grease.
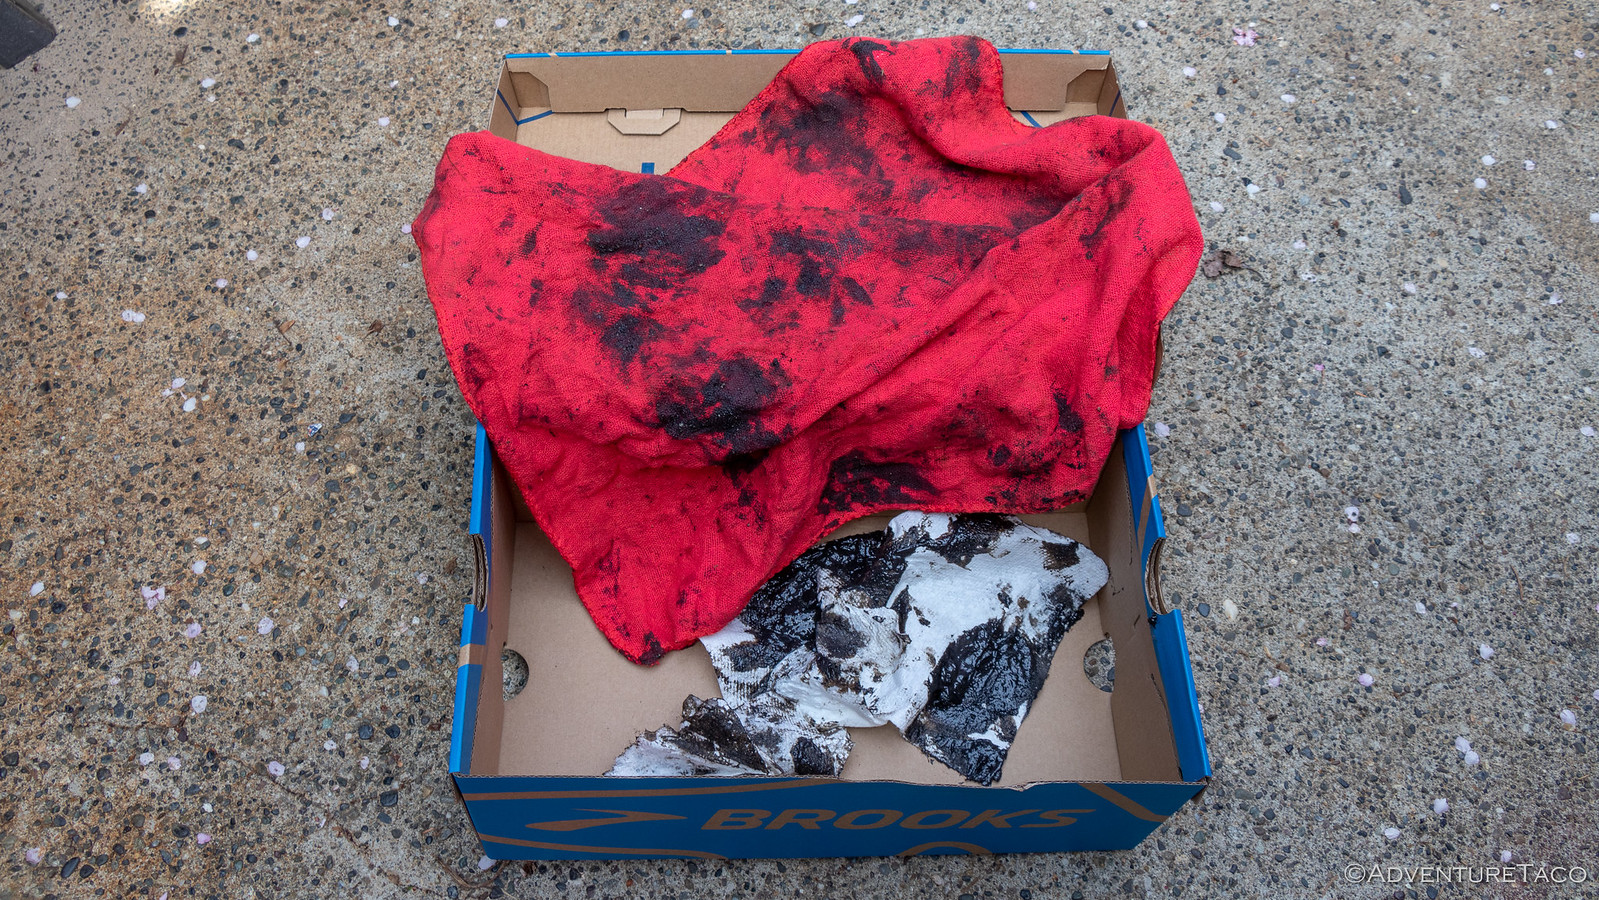
- A bunch of shop towels to mop up all the axle grease.
Rebooting a Tacoma CV Axle
Parts and tools acquired, it was time to get started. The process is reasonably straight forward once you've done it once - or maybe even before you've done it once, depending on your comfort level - I was planning to do both axles, and had allotted a day to do it, just in case anything went south.
I got started - as one does - by removing the skid plate. I recommend admitting to yourself that it's heavy and using a floor jack for this. Just don't take a photo - then you can can tell everyone else you muscled it off with one hand while you loosened bolts with the other.
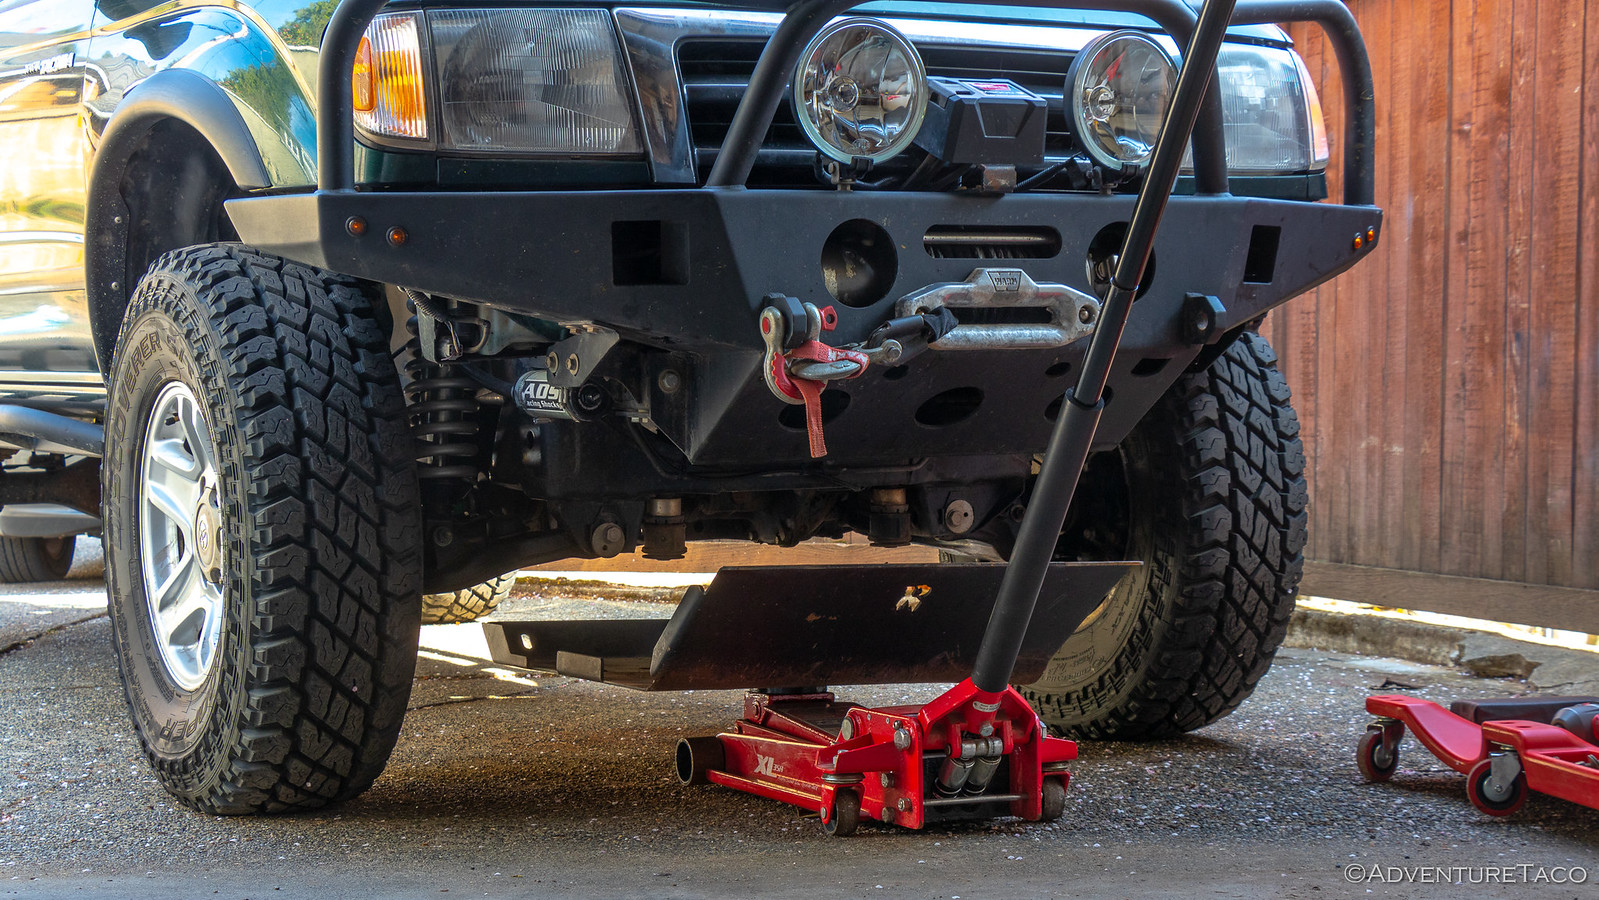
Next, get the front of the truck up on jack stands and remove the wheel, followed by the axle nut cover. This is my least favorite part of the process - it's always harder to pry this cover off than I expect, and I always feel like I'm marring it up in the process. I've found that a narrow screwdriver and a traditional hammer (not a dead-blow or mallet) works best to pop it off.

With access to the axle nut, remove the cotter pin and capture washer so that you can pull out your uuga-ugga wrench - I recommend a Milwaukee Fuel Mid-Torque Impact Wrench, but you could also use a long breaker bar - to zip of the nut and release the CV axle from the hub.

Now it's time to get the hub assembly out of the way in order to pull the CV out of the front differential. There are several ways to do this, but I've found that the easiest by far is to unbolt the four, 14mm LBJ bolts from the spindle, and then swing the spindle and hub out of the way, exposing the CV axle and giving it a path to exit the vehicle.


To separate the CV from the front differential, use a pry bar between the mating surfaces and give it a little tap - the CV will pop right out, and you can snake it out past your front suspension. Then - as best you can - clean up some of that grease that was keeping your suspension from rusting - and get the axle to a surface that will be easy to clean all the grease off of, because things are about to get messy!

The first step in the reboot process is to remove the small snap-ring that indexes the axle into the front diff. New snap rings are included in the reboot kit, so I found that it easiest to just pry off the existing ring with a flat-head screwdriver.

Next, it's time to cut off the inner CV boot - for me, the one that had failed. Before you do this however, it's important to mark - with a punch or sharpie or both - the cup and the axle. This is so that they can be reunited - like long lost lovers - in the same orientation during re-assembly.

Then, start by cutting the large and small boot clamps with some cutters, before using those same cutters to slice the entire boot. This will allow you to remove the boot and cup, likely covering yourself in grease in the process.


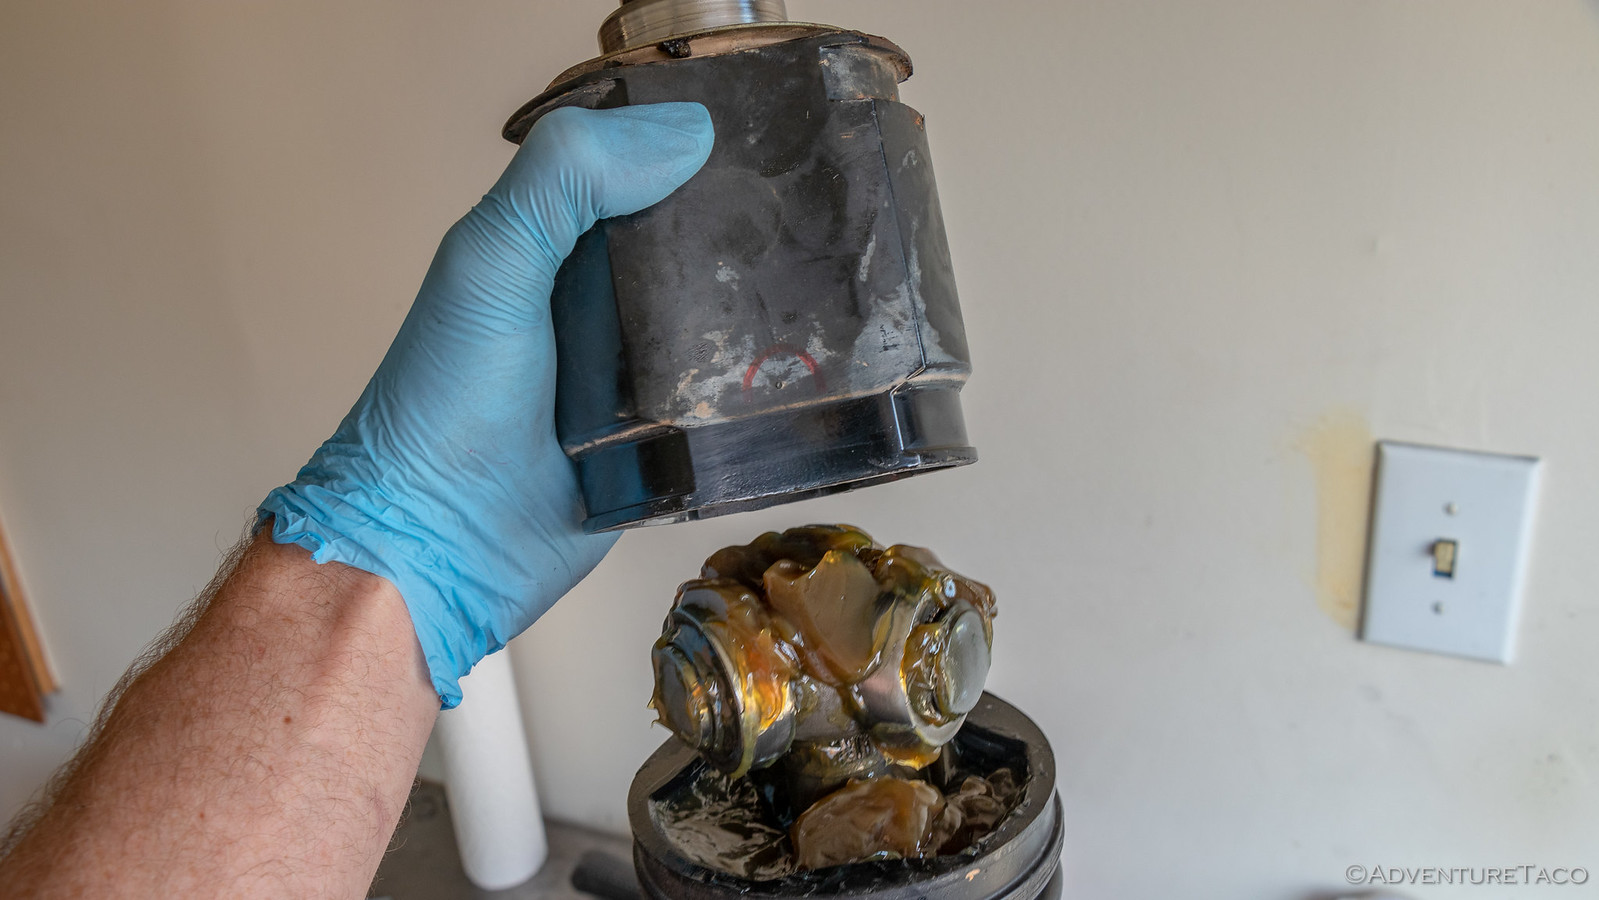
For goodness sake, clean up a little bit at this point. Use a rag and clean off the roller head of the CV axle, so that the next steps aren't quite so messy. It doesn't need to be perfect - we'll get to that in the future - but anything you can do here to not have grease dripping everywhere will be beneficial.
With some of the grease mopped up, the next step is to slide the snap ring that is below the roller head down the CV shaft a little way. This is important because it will allow you to slide the roller head down the CV shaft, exposing a second snap ring that captures it under normal operation.


Remove that snap ring - again, replacements are included in the reboot kit, so no need to be overly careful here - and then just like you marked the cup and axle, also mark the roller head orientation on the axle - I made a mark on it that aligned with the other two marks. Then, you can remove the roller heads and lower snap ring from the axle completely.

Don't forget to key the roller head orientation on the axle!
 <
<

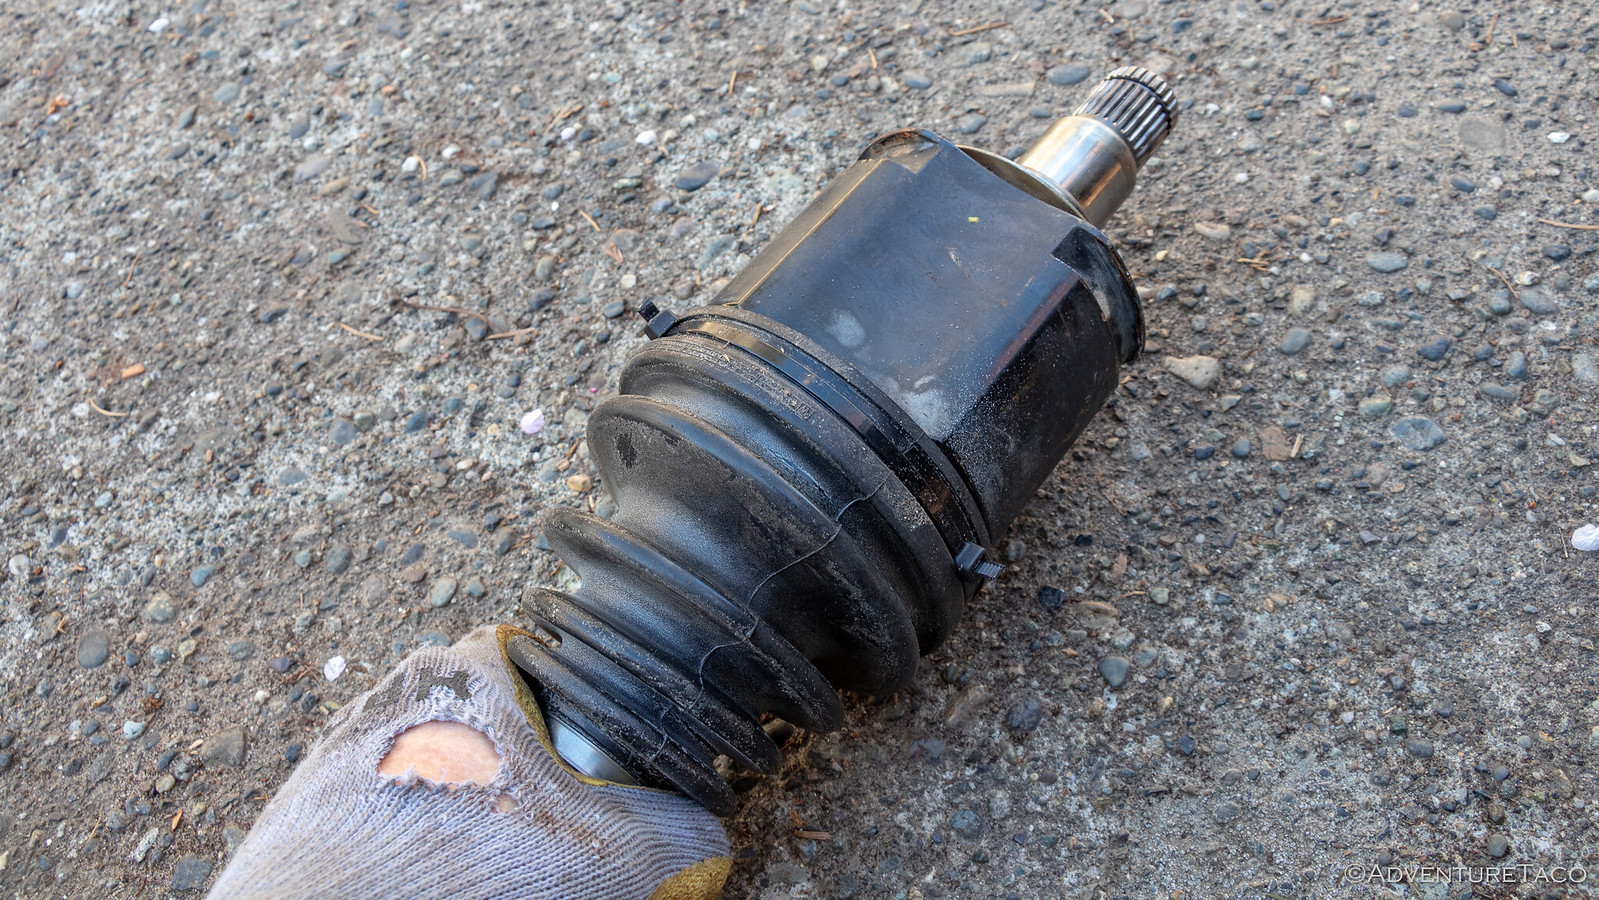
Half of the axle now disassembled, there's really only a bit more to do before we start reassembly. The outer joint of the axle simply needs it's boot removed, since unlike the inner joint, it remains assembled through the process.
Start by cutting the boot clamps. I'm sure that stronger folks could use some cutters here, but I resorted to my angle grinder - it made quick work of the clamps and made me smile in the process. Then, cut the boot and clean up as much grease as you can. Again.

We're doing great!  Everything's now apart and it's time for a bit more clean-up and then reassembly. Start by cleaning the roller heads and CV cup well - a bit of brake cleaner can work wonders here - and lay out all the parts you'll need to rebuild your axle.


Rebuilding is essentially the reverse of the deconstruction process, so start by wraping some tape around the spines of the axle - protecting the rubber of the CV boots from getting chewed up as they are slid over.
We'll start with the outer-most boot. Grab the boot that's made of harder rubber/plastic and the large, eared CV boot clamp (Note: it's got to get on now, or you won't be able to fit it over later - tape it up out of the way if it keeps falling down onto the boot), and slide them over the splines and onto the CV, making sure you've got the right orientation. Click the small end into place - there's a groove it will click into - but don't secure the small clamp quite yet.
Then, flip the axle over so that you have access to the wide side of the boot, and fill it with all of the dark colored grease included in the kit. When you're done, it should be nearly full.

Now it's time to secure the boot clamps. Using the boot clamp tool, secure the small clamp first by pinching the ear as tight as you can. Then, do the same with the larger clamp. Once you have, you can manually rotate the joint a bit in order to distribute the new, clean grease across all the surfaces.

With the outside of the joint done, it's time to tackle the inside.
Start by sliding on the small boot clamp (again, you won't be able to get it on later) and the "softer rubber" CV boot - small side toward the center of the axle.

With the boot pushed as far down as you can (likely, the small end will "key in"), use the snap ring pliers to place the new snap ring low enough on the splines to allow the roller head to slide down the splines.

Replace the roller head - remembering to align the marks you made earlier - and then install the smaller snap ring on the end of the splines. Once this is done, you can slide the roller heads up and over the smaller snap ring, and then use pliers to secure the lower snap ring into it's designated slot.

At this point, you can ensure that the small end of the boot is seated in its groove and you can squeeze all of the light colored grease included in the kit into the boot and over the roller heads.
Looks like caramel, mmmm. 

Then, reinstall the cup.
The last step of the rebuild is to install the CV boot clamps on this end of the joint. The small clamp is easy - assuming you remembered to slide it onto the shaft, since it installs just like the clamps on the outer end of the axle.
For the larger clamp, I recommend using these Moog clamps (or this kit if the Moog are out of stock) so that it too is installed with the same boot clamp tool. Here's why - below are the two styles of clamps. Three of the four clamps (the two smaller clamps and one of the larger clamps) are styled like the clamp on the right side of this photo. These can be tightened just fine with the Lisle 30800 CV Boot Clamp Pliers (or Knipex Tools 10 99 Ear Clamp Pliers). However, one of the clamps (shown on the left) is of a different variety - instead of crimping a single ear, a second special tool is needed which bites into the small protusion and attempts to cinch the clamp further together...over the barbs shown on the far left. With over a centimeter to tighten however, it's just too much pressure on the clamp and the steel catch ends up ripping. This then results in the tool never being able to pull the clamp together enough to catch the last barb.

In fact, I wasn't actually able to get the supplied ear-less clamp installed - it was too tight, and was ruined by the cheap set pliers I purchased at my local auto store. Of course, in a pinch, some really tight zip ties will work for a short time, until the Moog clamps (or really, this kit ) can show up at your door.
At this point, you've completed the rebuild of your CV. With the right tools, it's not all that hard - just messy. And now it's time to get it reinstalled in the truck.
That's reasonably straight forward as well - just the reverse of removal - so I'll only highlight what I think are the key bits.
First, when re-inserting the CV Axle into the front diff, it can be frustrating to get it fully inserted. I've found that orienting the snap ring so that the opening is on the bottom makes it easiest to push the splines into the diff.
Second (and I suppose third), don't forget a bit of blue loctite on the LBJ bolts when you reinstall and torque them to 59 ft-lbs. This is critical on our trucks, given the less-than-ideal design of this part.
Lastly, the axle nut needs to be torqued to 174 ft-lbs. That's a lot. You can do it single-handedly - if there's no one around to press on the brakes to keep the hub from spinning - by inserting a screw driver into one of the blades of the brake rotor, and against the caliper. Those two parts are plenty strong to keep the hub from rotating while you tighten up the axle nut.
Oh, and of course - don't forget the axle nut lock washer and cotter pin, and your lug nuts should be torqued to 89 ft-lbs!
Hi
Detailed step by step procedure, it help me a lots and save money
Thank you
Awesome! You're welcome :).
Man, I really appreciate all your write ups. You’ve helped me a few times. Thank you.
Awesome, glad to hear it! ???
I am preparing to do this and have everything I need, but I have one question. I saw a post on Tacoma world that mentioned measuring and burping, see below. Did you do this or have you had any problems with not doing this? I will probably take a general measurement before and after, but I really dont see how it would change much from just replacing boots.
"The key here is measuring the original axle in its extended position as well as its contracted position and its neutral position . When replacing CV boots , They must be burped of air before the new clamps go on . If you dont burp the air properly , the axle will be too long and will not plunge causing damage to the diff or wheel bearings . This is why its very crucial to measure all 3 positions before you replace the inner boot"
Hi Cass, I've never heard of burping before and never known anyone who has done it. Further, it's not mentioned in the Factory Service Manual, so I wouldn't worry about it as long as you get all the great into the boots.
Have a fun time with the project, it's a bit tedious but otherwise not difficult!
Great thanks for the quick reply!
Curious why you have to remove the axle completely? . Couldn't you just leave the outer hubside attached? Boots all slide from diff side anyway.
Hey Andrew, It'd be pretty hard to clean and manipulate the axle if it were still attached to the hub vs. being on the workbench. Even if there was some reason to leave it attached, removing the hub (via the upper and lower ball joints) is a much tougher operation than simply removing the axle nut to remove the CV axle. Is there a reason you're asking?
How catastrophic is it if the marks I made to align the roller heads completely rubbed off and now I can only guess to alignment? What can I do to avoid catastrophe at this point?
Hey Marie, it’s probably not ideal, but it’s also nothing to really worry about. Just reassemble it and you will be just fine. Lots of other people have forgotten to mark their assemblies without issue.
Thanks so much for the reassurance. I’m pretty sure I got it close enough!
Hi there! Thanks for posting this, I followed the steps and rebooted my axle. One point you might add.
I wanted to use the OEM clamp provided vs. the Moog option so I found that these pliers did the job. Took me about a minute to cinch the clamp down.
They are on Amazon for ~25 bucks so not a budget buster: OTC 4724 Stinger Ear-Type CV Boot Clamp Plier
Thanks Travis! I wasn't able to find one of these that worked well, but I never found the OTC variant. I'll add this to the post as well. Cheers!
Cool thank you! The Moog clamps were out of stock and the "back up" for the Moog clamps have teeth that point down to catch the band. I was worried the downward facing teeth might have eventually damaged the boots and I only want to do this job once 🙂
Great info thank you! Almost looking forward to one of my CV's grenading so I can use this tutorial. Lol
LOL, that's awesome. I don't wish grenading axles on anyone, but hopefully you'll be in a better situation to fix it if it does! ?
Hi, I've read a few write-ups on this subject and I gotta say that I liked yours the best so far. Great job and thank you!
There is one thing that nobody mentions, though. The ends that do all the work, repairing, replacing, or inspecting the roller head or the other end (whatever that's called). When everyone uses the phrase "rebuild", is it just a "reboot and re-grease"? Can you elaborate on this? Thanks
Hey Collan, glad you found the write-up useful. As far as rebuilding vs. rebooting, I think the vast majority of people only ever reboot - in fact, I don't know that there are parts available to rebuild the tulip (the needle bearings on the inner end of the CV axle). At the point that you need to actually rebuild the bearings, you might as well just purchase a new axle from CVJ or Toyota. I'm curious - have you found the parts, or do you know that you need to rebuild the tulip?
I've only gotten as far as buying oem boot kits from Toyota, but I opened them and inspected them bcuz I still need to get the crimping tool. So I pulled the boots out and the outer boot feels like it's made out of a plastic, like something that goes on a kids toy. It doesn't seem very "bendy". I'm not sure I wanna put that on my truck now.
That's the correct boot - the inner and outer boots are made of different material, likely due to significant research by Toyota. Their CVs have been booted this way for decades, and the boots have proven to work quite well. Personally, I don't think you'll find a better solution out there.
How hard did you have to crimp the CV boot clamps? I swear I cranked on those pliers really hard and I still have grease leaking out of the new boot after the clamp.
The tighter you can get them, the better, Reggie! When you clamp the ears, there should be - ideally - no space between the bits of clamp that are pulled together
Also - when you say you have grease leaking out - is it from one of the large or small clamps, and is it before you reinstall the CV on the truck, or when it's already running?
(you can't post photos to the comments, but feel free to send me one via email, I can get it posted here for you, and give you my opinion on what's going on)
Great writeup, but quick question,
Did you drain the front diff fluid and if not did it create a mess by not draining first?
Hey Mike, there's no need to drain the front diff before pulling the CV axles. When you take them out, you'll get a few drops - maybe a tablespoon or two - of gear oil that will come out, but that's it; the rest stays put where it should be (in the diff).
These guides you make are the best, man! Thanks for taking the time to make them up. I will take rebuilding an OEM CV shaft over a cheesy aftermarket one any day!
Thanks!
Thanks so much for making this repair guide. Your pictures of how to get the end of the cv tulip off were priceless. That info doesn't exist in the oem repair manuals for the 1998 taco or any where else on the internet. THANKS AGAIN!!!!
Awesome to hear Ryder; I'm always happy to help!
It was not difficult to use an adjustable wrench (channelocks) to set the closest inboard clamp (closest to front diff). However, as mentioned, the Toyota bands require 09521-24010 also found on ebay for 38$.
Did you use that special tool for the three similar clamps, or the one dissimilar one?
Wow great write up! This has inspired me to rebuilt the factory set I took off years ago do to torn boots (post lift). I'm on my second set of Napa axles do to torn boots and I'm fed up looking for a solution. My truck has a diff drop and OME 3" lift. Should I Build them the way you have suggested here or should I add the "boot slide mod" I've seen mentioned in other places? Just want to minimize my chances of tearing anymore on my lifted Tacoma.
Hey Joseph,
Personally, I'm not a fan of the boot slide mod. I've found that with the OEM boots, it's not necessary. The reason, I think, is twofold: First, the OEM rubber is much higher quality than anything aftermarket; as such, it can handle a bit more than most lower cost boots. Second, I think the boot slide mod actually puts the boot under more strain most of the time, by pulling it "longer" than it was meant to be. Of course, proponents of the boot slide will tell you that this keeps the ribs of the boot from rubbing against each other, but really, if your CV angles are that bad, the better thing to do (for many reasons) is to lower your lift just a hair.
Also, from my experience, when people first put a lift on their truck, their (usually original OEM) CV boots tear. That's because the boot rubber has "memory" of a certain resting position, and the new lifted position puts strain on them all the time. Those who simply reboot with new OEM boots - which begin their life at a new resting position - rarely tear the new set. However, those who put on aftermarket CVs often have to replace them regularly due to torn boots. This is - I believe - due to the rubber quality that I mentioned previously. And of course, this is just what I've seen with my buddies and in conversations with others; any one person's experience could be different.
Hope that helps!
Awesome! Thanks for the reply and I shall move forward with the reboot process. This site is great man, really enjoying poking around here.
Just read your tutorial, and you went around my problem by taking outer boot off from inner end. I need to get the outer joints off the axles. I don't see any kind of snap ring or anything, like on all the german cars I used to work on. What the heck is holding those outer ones on the shaft?
(I need to use outer joints as "stub axles", to isolate my blown front diff until I can rebuild it) Please advise if you know. Thanks!
Hey Barry, you've got a lot loaded up in that question, so I'll address a couple things for folks who may read the answer...
Some background: one of the important functions of a CV axle on a 1st gen Tacoma is keeping the front wheel bearing loaded in the hub. This is accomplished by having the cup of the CV axle sandwich the wheel bearing between itself and the hub. In most cases, this is just "normal operation." However, in the case that you are out on the trail and break your front diff (bummer), having the CV axle in place will cause the front CVs - and thus portions of the front diff, even though it's not connected to the drive line - to continue to turn, which is no good in the case that it's broken. Now, if you have manual hubs, you can simply unlock the front CVs and solve the problem, but with ADD (Automatic Disconnecting Differential), the way to solve the problem is to remove the actual CV shaft from the two cups, putting one into the front diff to seal up the hole there, and the other into the hub to keep the front wheel bearing loaded (and from falling out of the hub).
So, the question is, how to get the outer cup of the CV separated from the shaft. The inner one is easy - the tulip joint just slides apart once the boot is removed, but the CV joint on the outer cup is much harder to separate. That joint is a press fit, so you essentially have three options:
Most folks that I know, go with #2. Just make sure to get the shaft cut off short enough that there's nothing spinning around and hitting other components like brake lines, suspension, etc.
Hope that helps!
Thanks for the quick response. I have Gen 2 Taco 2008, but all the same...
I cudnt find a listing for the stub axles for the two-wheel drive version, so yes, I am going to use the outer cv's, emptied of their "guts", as the stubs. Found another video where the guy used a length of 1 1/2" I.D. steel pipe, a few inches longer than the axle, and with the axle in the pipe, one end against the inner part of the joint, slamming the other end of pipe repeatedly on a hard surface, until internal clip finally let the axle separate.
I did this. Took quite a few very hard whacks on concrete surface, but it worked. No axle cutting.
I will pull both axles and forward driveshaft, to isolate diff 'til I can fix it.
Ahh, nice - that's a great trick! Thanks for sharing it here! Once you got the axle shaft out, did the rest of the CV joint come out as well?
Yes. Once the axle shaft was out, I cud roll the cage far enough to remove the balls, then with a little more trial and error moves, got the cage and center block out, with a slight tug (no tools).
Then center block, with a little more manipulating, came out of cage. Cleaned it all n saving it for re-assembly later. The outer cup is now a stub axle. I suggest if anyone does this, coat the inside of cup with white grease, battery terminal protector, or maybe plasti-dip. Keep the rust off so you can re-assemble later.
Thanks for the write up. I had been considering aftermarkets but like this idea better. I have a 2000 taco w manual hubs. It looks like you have ADD. I know the cv axles are different- is the boot kit appropriate for either application? Thanks
Hey Brandan, great question and glad to hear you're considering this - I think it's a way better option than any aftermarket CVs! The boot kit is the same for both ADD and manual hubs, and you'll find the rebooting process to be similar as well. ?
Thank you, God bless you man
Amazing job
Glad the write-up was helpful for you! 👍
turbodb!
the complete reboot kit FINALLY arrived from Toyota parts that i ordered in early October... 5+ months they have been on nationwide backorder 500+ order is what the dealer told me months ago.
Now i can attempt to do this proper to the 27 year old OEM axles on my rig and get rid of the nasty NAPA axles i have been wheelin with since October '23 that i swear are causing weird vibrations at freeway speeds.
Nice, glad you finally got them in! I'll have to keep an eye out, and maybe pick up a couple kits just to have them on hand, now that they are coming back in stock. Good luck with the rebooting, and good riddance of the Napa CVs!
I had front diff fluid spill out when pulling the cv, did this happen for you? How do I refill the fluid and how much? Thank you so much for all your write ups they’ve saved me so much time and hassle
Hey Luke, a little fluid might come out, but it shouldn't be too much. You shouldn't have to replace it, but if you want to, the way to do that is covered here: Front Diff Oil Change - Not an Ideal Situation
You can reference this photo - it's the hex plug there on the front of the diff that you remove, and fill with gear oil. Personally, I like Lucas 80W-90 Gear Oil.
Hope that helps, shout if you have questions!
Awesome write up and your explanation of why using OEM boots inspired me to order a set (now to deal with the aftermarket ones I previously purchased). I'll also skip the boot slide mod. The removal of your axles was like butter. I've had no such luck. The getting the spindle out of the hub took forever. Spray hammer, spray hammer, etc until it finally came out. My inner boot was torn so I marked everything and just left the cup on the truck. So, 1st question; I've inspected all splines on both the axle and hub and I don't see anything (rust, gunk,etc) that would cause it to bind (also had the axle and near zero degree of horizontal center) Any idea what caused this? Somebody had been in it before but everything looked ok. 2nd Q, I completely doused everything with penetratiing spray, do I need to worry about the hub getting soaked as well - what can I do to try and save it? Should I put some antisiez on the axle before reinstalling? Lastly, I can't get the inner cup out of the diff. I tried pry bars + while rotating, slide hammer with the CV adapter, next I was going to try wrapping steel cable around it and attaching to a sledge hammer. Any other suggestions?
Glad you found the guide helpful! Not sure why you had a tough time getting the axle out of the hub, but a bit of anti-seize on that end should help to keep things moving in the future. The other end - where it enters the diff - can certainly give a bit of trouble given the little retaining clip set into the end of the splines that catches on the mating surface in the diff itself (the one shown here). The key - which is sometimes easy and sometimes a serious PITA - is to get it rotated in such a way that it presents as little friction as possible as it is pried out. Unfortunately, since you can't see it while you're trying to get it into that position, it's just a bunch of trial and error (as you've discovered).
I'd not use a hammer/sledge, but I'd go back to the pry bar, as I've found that the more "gradual" pressure that it allows can be useful. Then, slowly rotate the cup a few degrees at a time and try prying again. If you get all the way around a couple of times, push the cup in toward the diff and wiggle it to try and dislodge the clip, then get back at it with the rotation/pry bar. Good luck!
I had both my leaky CV axles replaced with OEM axles ($$$) before I knew about the reboot kits. Luckily I was told not to get rid of the old ones so I hung on to them. Found your write-up and it sounded doable so ordered the kits and tools you suggested. Got everything needed and decided to open one of the kits to see the clamps. I was expecting that one of the larger clamps was a different design than the other three, but wasn't expecting them all to be different sizes. Reread your article and saw no mention of that, but did a dry fit on the boots and it was obvious which clamps went where. Well off to get a bunch of rags and shop towels and then it's on. Thanks so much for doing this.
Sure thing, happy to hear that you're finding it useful. You're right that I never really talked about the clamp sizes in the write-up, and you nailed the reason why, too. Once you get the boots out, it's obvious which clamp goes where! Have fun with job, it can be a messy one! 👍